Events Plugin Documentation
The Events Plugin extends the application’s core functionality by enabling event tracking, custom event properties, and campaign decision-making based on real-time user interactions. It provides a structured way to define events, associate properties, and leverage them in campaigns for precise targeting and reporting.
Installation Setup
Prerequisites
- Administrative access to install plugins.
- Composer (if plugin dependencies are managed externally).
Installation Steps
- Copy the EventsBundle into the application’s plugins/ directory.
- php bin/console mautic:plugins: reload
- Log in to the application’s admin panel and navigate to Settings → Plugins.
- Locate the Events Plugin and click Install/Update.
- Verify that the plugin is active.
- Clear cache and run bin/console m:a:g
Events CRUD
Two types of Events can be defined in the application. Defined & Undefined.
Defined are the events which are created by the user from UI, and undefined are the events which are created automatically by user interaction at the target website.
Defined Events
Adding Properties to an Event
When creating a new event, you can define Event Properties by switching to the Properties tab. Each property represents a piece of data associated with the event (for example: purchase amount, product category, webinar date).
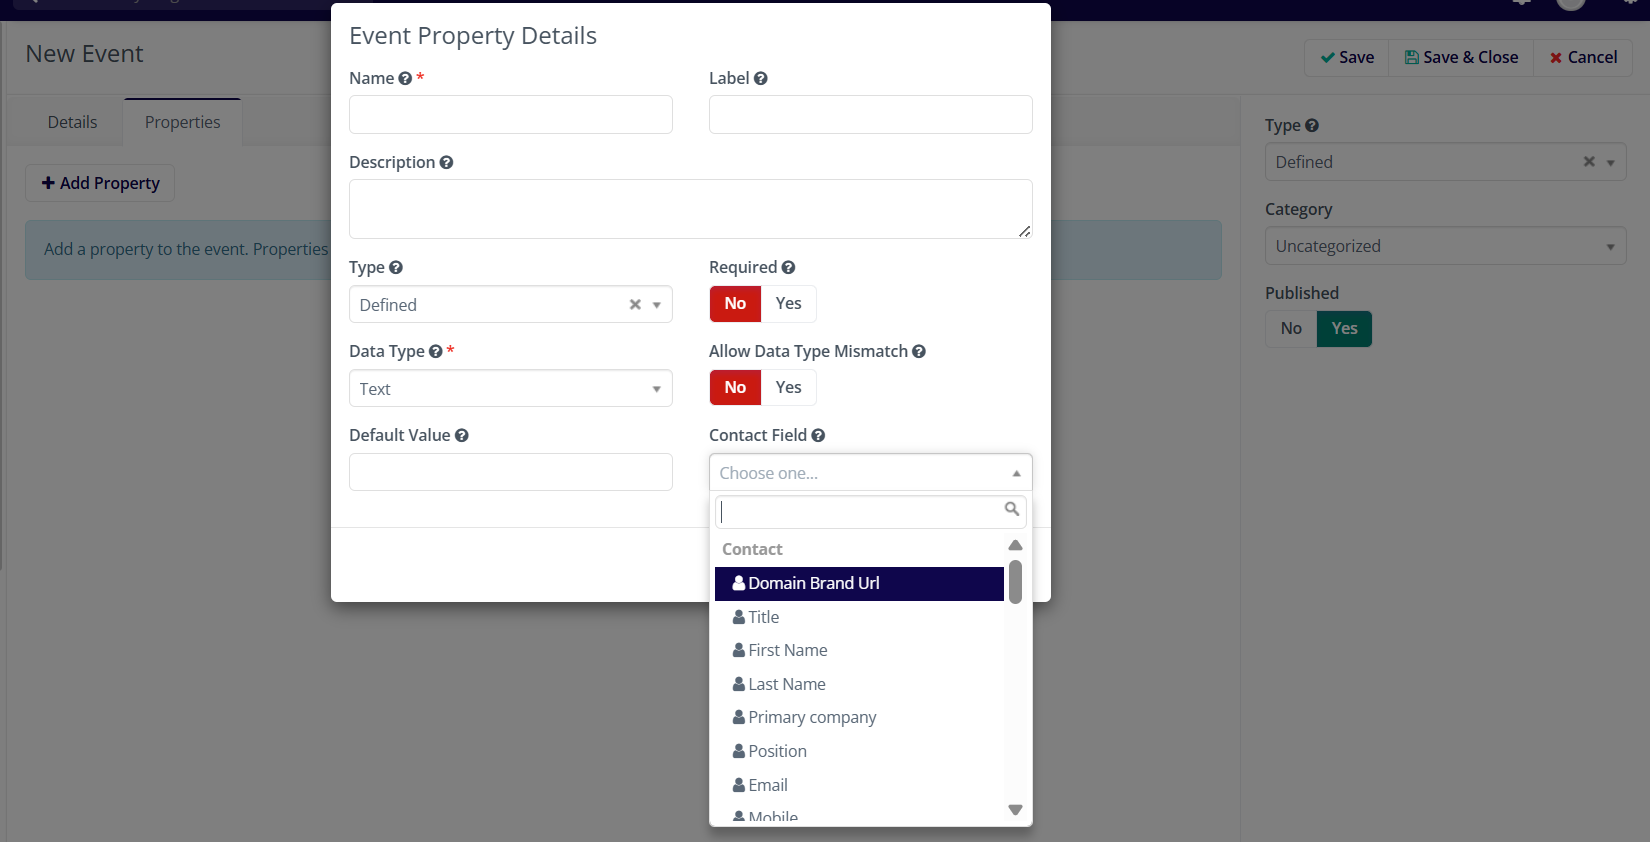
- Click Add Property.
- In the Event Property Details form, provide the following information:
- Name – The internal identifier for the property.
- Label – The user-friendly display name.
- Description – Optional details explaining the purpose of the property.
- Type – Defines whether the property is Defined (preconfigured) or UnDefined.
- Required – Select Yes if the property must always be present when the event is tracked.
- Data Type – Choose the format (Text, Number, Date, etc.) to validate incoming data.
- Allow Data Type Mismatch – Decide if your application should accept mismatched values (e.g., a string in a numeric field).
- Default Value – A fallback value if none is provided.
- Contact Field Mapping – Optionally link this property to your application’s contact field (e.g., First Name, Email, Company).
- Save the property.
- Repeat the process to add multiple properties as required for the event.
There is no limit to the number of properties you can attach to a single event, and similarly, you can create as many events as your use case demands.
Undefined Events
In addition to manually defined events, the plugin also supports Undefined Events. These events are created automatically based on user behavior when event data is sent from your application, even if the event has not been explicitly defined in advance.
For example, using the mtc tracking function, you can send an event like this:
mt('send', 'product_add',
   { productId: 2, quantity: 1, etc., },
   { email: 'name@gmail.com', name:'john', etc., }
);
The general syntax is:
mt('send', eventName, {eventData}, {contactData});
- eventName → The name of the event (e.g., product_add, checkout, page_view).
- eventData → Key-value pairs representing event properties (e.g., productId, quantity).
- contactData → Information that identifies the contact. If the contact is new, this data is used to create a new record. If the contact already exists, the plugin uses the unique identifiers (such as id, email, or another configured field) to update the existing contact profile.
The plugin also makes use of mtc_id for tracking, ensuring that updates can be tied to the correct contact across different sessions and devices.
This mechanism allows you to send events dynamically without prior setup. If the event name doesn’t already exist as a Defined Event, the plugin automatically creates it as an Undefined Event, which can later be converted or mapped into a properly defined event type.
Enabling Event Tracking
To begin tracking events, you must configure the tracking secret.
- Navigate to Settings → Configuration → Events Settings in your application’s instance.
- Copy the unique token displayed. This acts as an authentication token, ensuring that only trusted sources can submit event data.
- Use this code whenever you send events through API or JavaScript. Requests without a valid secret will be rejected.
Event Tracking API Endpoint
All event submissions are made to the following endpoint:
http://<application-url>/mtc/event/track
- Replace <application-url> with the base URL of your application’s instance (e.g., instance.localhost, your.company.com).
- Include the copied Secret Code in the request header as secret: <token>
Example: Sending an Event via API
curl -X POST http://your.company.com/mtc/event/track \
  -H "Content-Type: application/json" \
  -H "secret: " \
  -d '{
        "event": "product_purchase",
        "data": {
            "product_name": "Laptop",
            "amount": 1500
        },
        "contact": {
       "email": "john.doe@example.com"
        }
      }'
In this example:
- event defines the type of event being tracked.
- properties store additional metadata about the event.
- contact identifies the contact associated with the event.
Event Analytics
Each time an event is tracked, the plugin records detailed metrics that can be explored directly from the Events area of the application.
- Accessing the Analytics View
- Navigate to Components → Events.
- Click on the specific event you want to review.
- Graphical Overview
- The top section displays a graphical timeline showing the total number of times the event has been tracked.
- Use the built-in date filters to view trends over hours, days, or custom ranges.
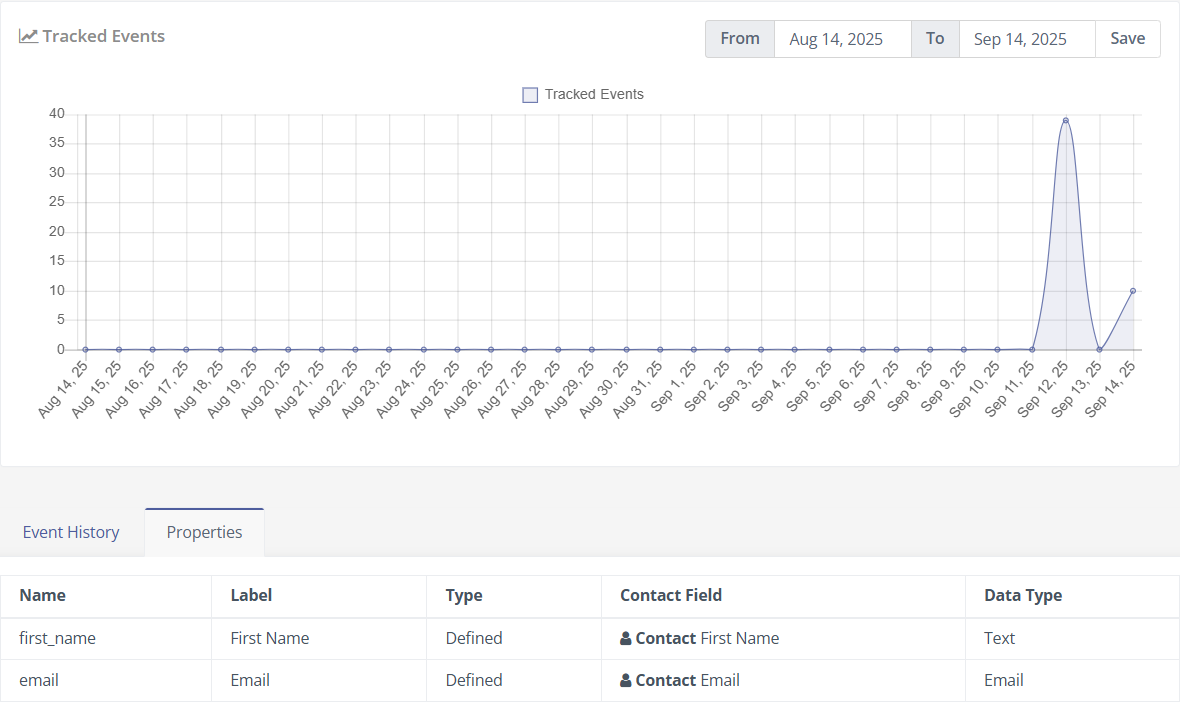
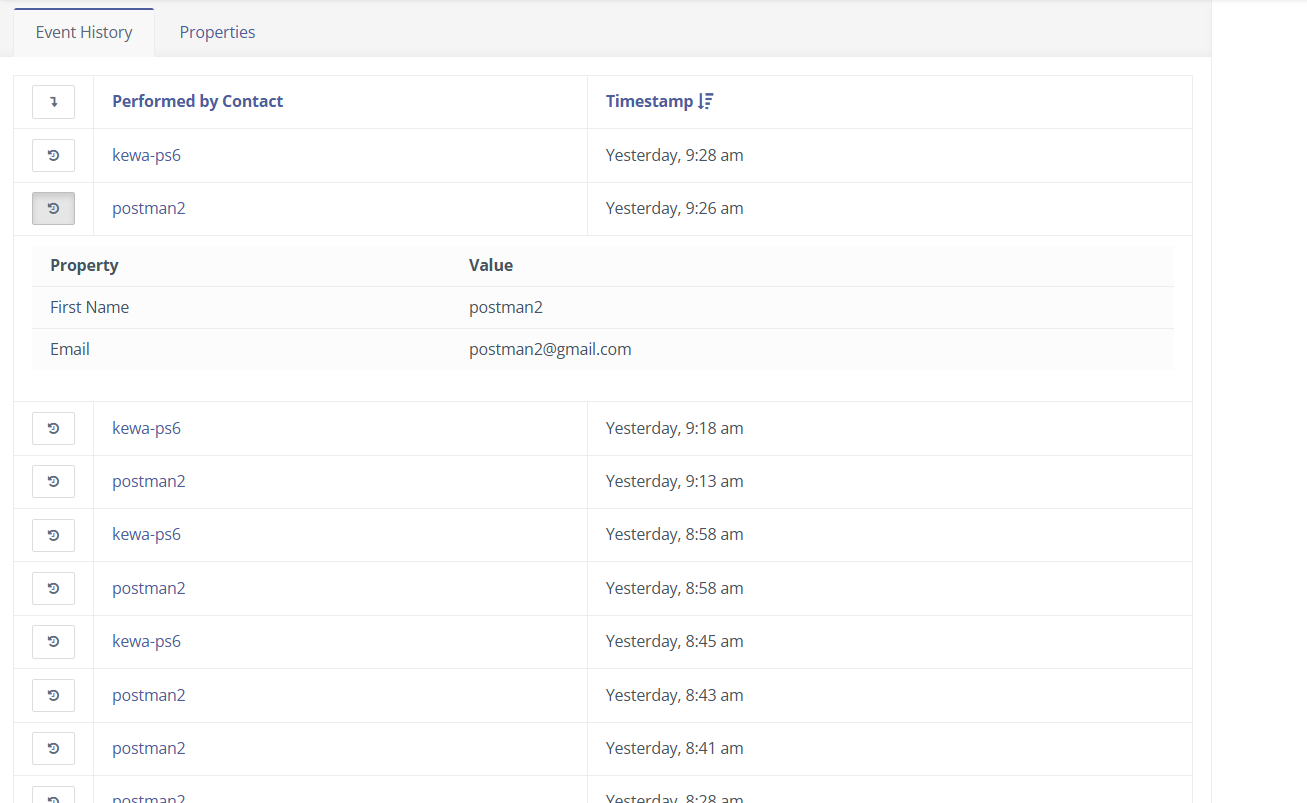
- Detailed Tabs
- Event History – A chronological list of every tracked occurrence, including contact identifiers, property values, and timestamps.
- Event Properties – A complete list of the properties defined for this event, along with their data types and default values.
This view gives you both a high-level trend chart and the underlying raw data, making it easy to monitor event performance, verify incoming payloads, and understand contact behavior over time.
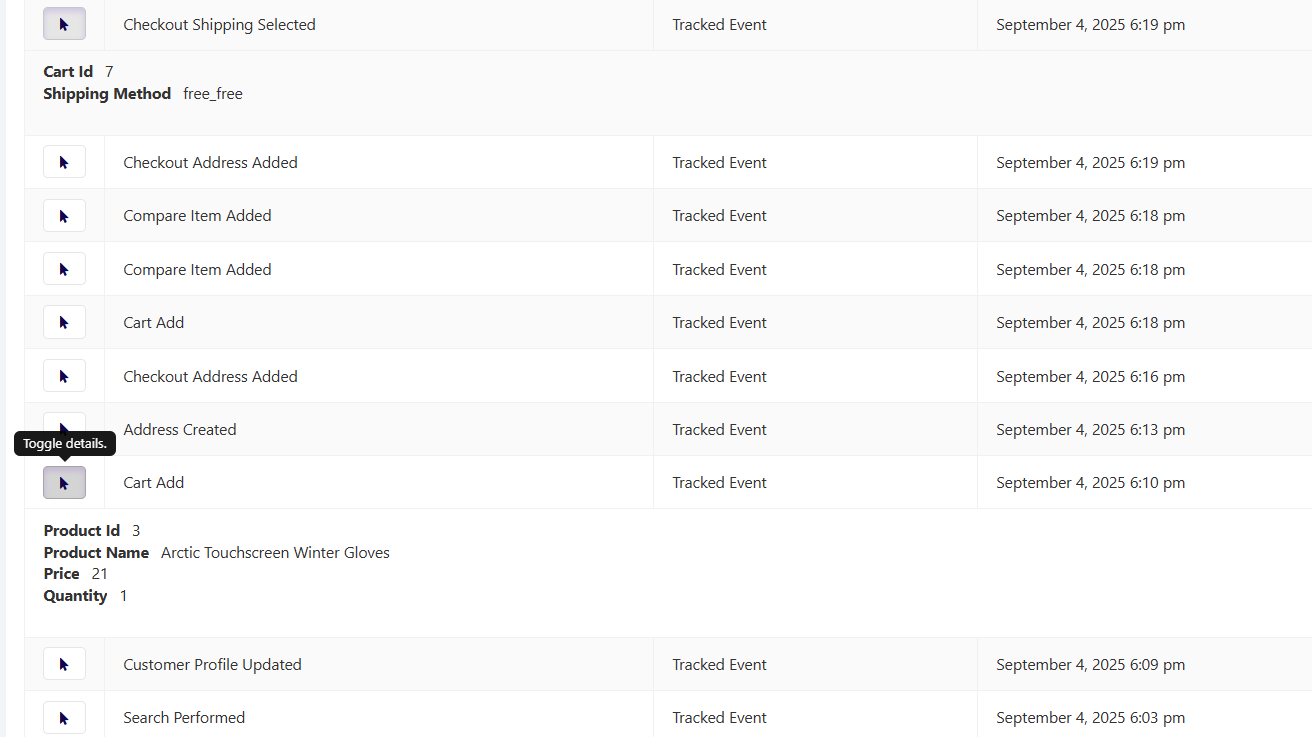
Contact Timeline
Whenever a user/visitor participates in any tracked event, a Lead record is automatically created if one does not already exist. The complete timeline of that lead’s activity—including the triggering event and its exact timestamp—is visible in the Lead’s detailed view.
Segment Filters
Once events and their properties are defined (or automatically created), you can use those properties as filters inside your application’s Segments to target contacts precisely.
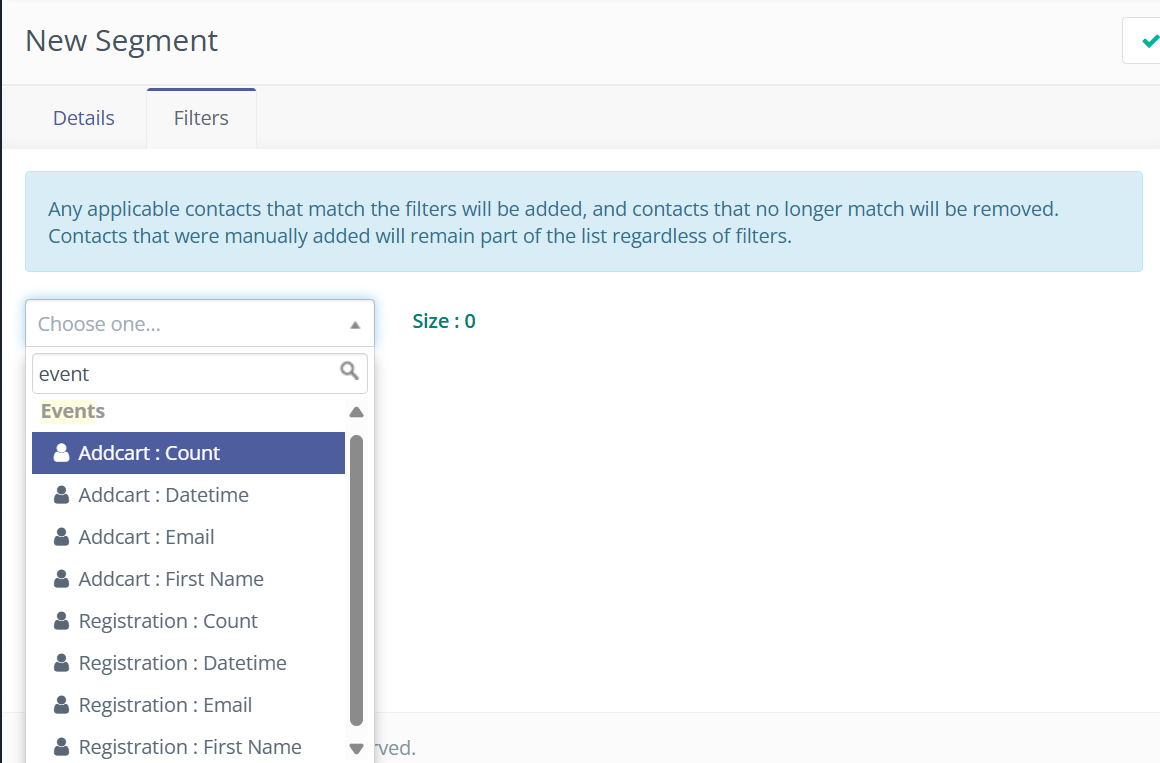
- Filter Availability
- Each event automatically provides two universal properties:
- Date/Time – Filter contacts based on when the event occurred.
- Count – Filter based on the number of times the event has been tracked.
- Along with these two universal filters, there will be a filter available for each property.
- Each event automatically provides two universal properties:
- Dynamic Operators by Data Type
- Additional filter operators are generated dynamically according to the property’s data type. For example:
- Text: equals, contains, starts with, ends with
- Number: equals, greater than, less than, between
- Date/Time: before, after, between
- Boolean: is true, is false
- This ensures that each filter offers only the operators that make sense for the property’s underlying data.
- Additional filter operators are generated dynamically according to the property’s data type. For example:
- Using Filters in Segments
- Navigate to Segments → New/Existing Segment → Filters.
- Add a new filter and choose Event Property as the filter type.
- Select the specific event and property you want to filter on.
- Choose an operator and provide the value or range.
This dynamic filtering system allows you to create highly targeted segments—for example, “Contacts who triggered Product Purchase at least three times in the past 30 days with a Purchase Amount greater than 5000.”
Event Decisions in Campaigns
The Events Plugin integrates directly with the application’s Campaign Builder, allowing you to react to real-time event activity.
- Add a Tracked Event Decision
- In the campaign builder, select Decision → Tracked Event onto the canvas.
- A configuration panel opens with a dropdown listing all existing events.
- You can select a single event or multiple events to monitor.
- NOTE: When configured with more than one event, it acts as an OR condition. The workflow proceeds if any selected event fires.
- Attach Actions or Conditions
- After choosing the event(s), you can connect Actions (send email, add to segment, adjust points) or Conditions (check contact field, verify segment membership).
- Each action or condition can be triggered whenever the selected event is tracked for a contact.
- Example Flow
- Decision: Tracked Event → Product Purchase
- Action: Send “Thank You” Email
This flexible decision node allows campaigns to branch dynamically based on any tracked event, making it easy to build automated journeys that respond instantly to customer behavior. After a campaign runs, the Events Plugin provides detailed reporting so you can measure how contacts interacted with your tracked events.